Valentina Valerievna Sayasova
I bring to your attention several experiments that we did with children when studying the topic « Space» .
1. Experience "Why does a rocket fly":
Let's take balloon and let’s inflate it, but don’t tie it, but press it with our fingers.
There is air in the ball, what will happen if we let go of the ball? It will fly correctly, it will fly like a rocket up and forward. Of course, the rocket is not inflated with ordinary air, but with a flammable substance. When burned, this substance turns into gas, which escapes from the rocket and pushes it forward.
2. Experience "Why is the Sun small":
It seems to us that the sun is very small and the Earth is large. But that's not true. The sun is huge. For example, if you take a soccer ball behind the Sun, our planet will be the size of a pinhead!
Now go to the window (or standing on the street, put your finger in front of you and look at someone) (or anything) into the distance, for example a person. It seems smaller than our finger! Is it true! But it only seems! We know that the finger less than a person. But why? Man is far from us, and the Sun is very, very, very far from us. And we see him small.
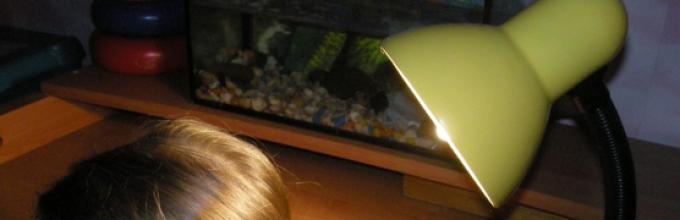
3. Experience "Day Night".
Why is it day in one part of the planet and night in the other? You can take a globe or a ball, or you can become planet Earth yourself. Stand with your back to the switched on table lamp (or flashlight) V dark room. The light from the lamp falls on your back, here the Sun illuminates the planet and it is day on this half of the Earth.

And on the other side is night. Now we are slowly turning towards the Sun Lamp (since our planet revolves around itself) and where there was night, day came and vice versa.

Literature.
Galperstein L. Ya. My first encyclopedia. - M. ROSMEN. -2003.
15.09.2014 Viktoria Soldatova
Space for children preschool age, which interesting topic! And the most important thing is that we parents don’t even need to get our children interested in it. They themselves are interested in the Moon and planets solar system what is there in the sky, how far the stars are from us and whether they have names. Preschoolers have very inquisitive minds and our task is to give them answers in game form. My son and I have already put together a whole series of activities and games about space. If you are going to give your preschooler answers to questions, I am sure that in one of my articles you will find information about this that will give an answer at your child’s developmental level. At the end of the article you will see a list for the entire series of classes.
From the article space for preschool children you will learn
- Poems about space for little ones
- Studying nebulae in space with a child
- Video for children about space
Speaking of outer space. I was recently looking through a folder creative works, where I collect Alexander’s works and sign the date of their execution. So, there I found one wonderful picture that amazed me and my husband to the core. Alexander likes shiny materials for drawing, we used them a lot for the New Year holidays. And so 5 months ago (you understand the height of spring) Alexander begged me for all the tubes of glitter. To avoid gigantic losses, I put the paints in the palette, water, and brushes on the table and went to the kitchen. This is what my preschooler drew.
Starry sky drawing3 years 6 months

Weightlessness: how to feel it
Weightlessness is a thing that is not easy to feel on Earth. It is felt at a certain depth under water - this is how astronauts train, in modern high-speed elevators you can also feel it, and for children the most easy way this is a swing. But not just when riding on a swing, but at an almost 90-degree tilt, when the child’s soft seat seems to come off the seat. It is in these split seconds that weightlessness is felt.

While studying weightlessness as part of the space project for preschool children, we watched a couple of videos. They are designed for older children - schoolchildren, but we were still interested.
Lesson from Space: The Physics of Zero Gravity
Amateur Experiences: Weightlessness on Earth
After watching the second video, Alexander realized that cosmonauts spend a year training to fly into space. One of the main trainings is the vestibular apparatus. Which, as you and I know, ends its development at 7-10 years old, and now my preschooler is only 3 years 11 months old. During my last visits to the park, I noticed that my young cosmonaut is trying to run where he used to walk, wants to “fly” higher on a swing, and even found in our park such a setup for riding on boards, where he tries to run to the very top . But so far he has not succeeded.


You can find out what exercises we did at home to train the vestibular apparatus.
Experience for preschool children with rocket launch
I wanted to complete our flight to the Moon, which we talked about in the post, by launching the Lunokhod. But not the lunar rover, nor any other of Alexander’s 276 cars wanted to move with the help of a balloon. It’s good that I try everything myself before showing it to the child, otherwise we would both be disappointed. Nothing, then we’ll launch a ball in the shape of a rocket! And even if all the mothers on the planet had already performed this trick with their children, I still wanted to repeat it, because the child’s emotions are worth it.
After trying it in a child's room, I realized that it was not long enough for a delightful launch. Therefore, our experience was transferred to the hall, where I tied one end of a woolen thread (you can use any) to the door to the terrace, and the other to a children's highchair. Flight length is approximately 5 meters. In advance, I put a plastic tube and tape on the thread so that the ball would be attached to the tube.

It was I who attracted my husband to help, he is holding a rocket from a ball.
This surprise awaited Alexander upon his return from the lyceum. The child ran to take off his shoes and wash his hands to see what his mother had come up with this time. Needless to say, we repeated the rocket launch experiment many times?
10,9,8,7,6,5,4,3,…START!

But the most important thing is probably not the child’s new impressions, but his new skill that he acquired after that. How long it took Alexander and I to learn to blow! , on boats, at and many other things we did on this topic. And finally, at almost 4 years old, it happened - the child just wanted to inflate the balloon himself. He wanted to launch HIS rocket and he did it! I don’t know how many times that day he inflated the balloons, in the evening dad begged for mercy and asked to remove these balloons out of sight, but that was not the case...

Lately, Alexander really likes to write everything down and it’s probably difficult to fully understand what I mean by this, so I’ll give a clear example. We often study using materials I have printed out - drawing along the lines to practice our hands. So this time, in the printed materials about space, there were tasks to circle the colors of the stars highlighted with dotted lines. The child traced them, took markers and began to write the words he had just circled on English language on a magnetic board.

The first word was written by him in capital letters and I simply drew his attention to the fact that in the assignments he wrote them in a written font. Which resulted in words being written in two fonts on the board. The whole process took Alexander 30-40 minutes, and therefore one of the planned classes was postponed to the next day. But in such situations, I adhere to the point of view “let the child do what interests him.”

And yes, my preschooler writes either with his left or right hand. He clearly hasn’t made up his mind yet, and maybe he won’t make up his mind. Time will tell; this process cannot be forced.
Somehow I got distracted from the topic of space.
Poems not only develop memory and literary taste, they can also be very educational. If you have just started the topic, it will be useful to learn this wonderful poem by Hite. It presents the planets of the solar system in order in a very easy, memorable way. Its study can be timed to coincide with Cosmonautics Day or simply as an interesting activity. Once your child knows the order of the planets, you can make layouts and create.


And here is another poem about the Milky Way, written by Rimma Aldonina. For your preschooler to understand well what the poem is about, look at the children's encyclopedia with him on the spread about the Milky Way. And the logical continuation after studying would be most interesting creativity– drawing nebulae, which we will talk about below.

Experience on the theme of space - creating nebulae
There are many beautiful, colorful nebulae in our Galaxy. As part of the space project for preschool children, we conducted an experiment that will clearly, vividly and interestingly show what nebulae look like. It has only one drawback: it is very difficult to stop! I just want to try different colors, their combination, change the fat content of the milk. I will advise you, dear parents, to continue until your preschooler has exhausted his questions.
Reference: A nebula is a section of the interstellar medium that stands out due to its radiation or absorption of radiation against the general background of the sky.
We decided to study nebulae in more detail (for our 3-year-old level, of course). First we read about them in existing books.


Let's start creating our nebula.
For this we needed:
- milk with good fat content (I took 6%)
- pipette
- food colorings
- cotton buds
- dishwashing liquid


I conducted my first experiment with the nebula myself. The result exceeded even my expectations - the nebula looked straight out of space! I focused the child’s attention on the fact that if we simply stir everything with a stick, then very quickly our milk will turn into a dirty liquid. You need to draw on milk carefully, calmly moving the colors across the surface. Alexander, of course, couldn’t wait to make such beauty himself, and when my “masterpiece” was finished, I poured pure milk for the child.
First, he dropped a few drops of different dyes from a pipette. It is advisable to drip it at a distance from each other so that the colors do not mix. Then the child takes a cotton swab and dips it in detergent and drops it into the center of a colored drop.


We observe the reaction and carefully, superficially draw on the milk. We repeated these drawings four times, the first was mine, in total it took me two cartons of milk. I'll show you how the child did it and his nebulae.


We really enjoyed this space-themed experience. If you are wondering why the dye does not immediately mix with milk and the colors of the dye do not mix with each other, here is a little help:
In addition to water, milk contains vitamins, minerals, proteins and tiny particles of fat, as if suspended in solution. Proteins and fat are very sensitive to changes in solution, in this case milk. The secret of this trick is precisely a drop of detergent or liquid soap, which weakens chemical bonds, holding fats and proteins in solution and reducing surface tension in milk. There's a storm going on chemical reaction, which we can observe thanks to food coloring. Once the detergent is evenly mixed with the milk (partly dissolved, partly attached to the fat molecules), the reaction subsides and stops. This is the secret of this entertaining chemical experiment. To replicate the color explosion in milk, simply add another drop of detergent.
Space – video for preschool children
As you know, children perceive information differently. Some people need to touch it to understand. Some people need to see it, but others need to work on the theme in a game, in poetry, in creativity. The final step in space exploration for preschool children may be watching a video. I will share with you only those that my boy was delighted with.
Video about space Encyclopedia for preschoolers
Astronomy for the little ones
Apparently the author of the title assumed that children begin to be interested in this science in primary school, he just doesn't know my son. But we are talking about preschoolers, and so that you don’t sit a two-year-old child in front of the screen, I’ll tell you that the video is suitable for ages 4-5.
Peppa fans will be able to carefully study the location of the planets in the solar system. In this case, the video starts from the farthest planet from the Sun to the closest.
And finally, I’ll mention a video of my childhood, which is suitable for older preschoolers and younger schoolchildren. Fantastic story the girl Alice, her geologist father and the bird Talker. Remember?
The mystery of the third planet
So, dear friends, as you can see, space is very exciting for preschool children and you shouldn’t wait until they start studying astronomy at school. Browse our other space activities and I'm sure you'll find Interesting games to their preschoolers, as well as many experiences and experiments.
Card index of experiences and experiments
on the topic "Space"
Experience No. 1 "Solar System"
Target : Explain to children why all planets revolve around the Sun.
Equipment : yellow stick, thread, 9 balls.
What helps the Sun hold up the entire solar system?
Helps the sun perpetual motion. If the Sun does not move, the entire system will fall apart and this eternal movement will not operate.
Experience No. 2 "Sun and Earth"
Target: Explain to children the relationship between the sizes of the Sun and the Earth.
Equipment: big ball and bead.
Imagine if our solar system were reduced so that the Sun became the size of this ball, then the Earth with all the cities and countries, mountains, rivers and oceans would become the size of this bead.
Experience No. 3 “Day and Night”
Target: Explain to children why there is day and night.
Equipment: flashlight, globe.
Ask the children what they think happens where the line between light and dark is blurred. (The guys will guess that it is morning or evening)
Experience No. 4 “Day and Night “2”
Target : Explain to children why there is day and night.
Equipment: flashlight, globe.
Content: We create a model of the Earth’s rotation around its axis and around the Sun. For this we need a globe and a flashlight. Tell your children that nothing stands still in the Universe. Planets and stars move along their own strictly designated path. Our Earth rotates around its axis and this is easy to demonstrate with the help of a globe. On the side of the globe that faces the Sun (in our case, the flashlight) there is day, on the opposite side it is night. Earth's axis is not located straight, but tilted at an angle (this is also clearly visible on the globe). That is why there is a polar day and a polar night. Let the children see for themselves that no matter how the globe rotates, one of the poles will always be illuminated, while the other, on the contrary, will be darkened. Tell the children about the features of the polar day and night and how people live in the Arctic Circle.
Experience No. 5 “Who invented summer?”
Target: Explain to children why the seasons change.
Equipment: flashlight, globe.
Due to the fact that the Sun illuminates the Earth's surface differently, the seasons change. If it is summer in the Northern Hemisphere, then in the Southern Hemisphere, on the contrary, it is winter.
Tell us what the Earth needs whole year in order to fly around the Sun. Show the children the place on the globe where you live. You can even stick a paper man or a photo of a child there. Move the globe and try with your children to determine what time of year it will be at this point. And don’t forget to draw the children’s attention to the fact that every half revolution of the Earth around the Sun, polar day and night change places.
Experience No. 6: "Eclipse of the Sun"
Target: Explain to children why solar eclipses occur.
Equipment: Flashlight, globe.
The most interesting thing is that the Sun is not made black, as many people think. Observing the eclipse through smoked glass, we are still looking at the same Moon, which is located opposite the Sun.
Yeah... It sounds incomprehensible... Simple means at hand will help us out. Take a large ball (this, naturally, will be the Moon). And this time our flashlight will become the Sun. The whole experience consists of holding the ball opposite a light source - here you have the black Sun... Everything is very simple, it turns out.
Experiment No. 7 “Rotation of the Moon”
Target : show that the Moon rotates on its axis.
Equipment: 2 sheets of paper, adhesive tape, felt-tip pen.
Walk around the “Earth”, continuing to face the cross. Stand facing the “Earth”. Walk around the “Earth”, remaining facing it.
Results: while you walked around the “Earth” and at the same time remained facing the cross hanging on the wall, various parts of your body turned out to be turned towards the “Earth”. When you walked around the “Earth”, remaining facing it, you were constantly facing it only with the front part of your body. WHY? You had to gradually turn your body as you moved around the “Earth”. And the Moon, too, since it always faces the Earth with the same side, has to gradually rotate around its axis as it moves in orbit around the Earth. Since the Moon makes one revolution around the Earth in 28 days, its rotation around its axis takes the same amount of time.
Experience No. 8 “Blue Sky”
Target: establish why the Earth is called the blue planet.
Equipment: glass, milk, spoon, pipette, flashlight.
Results : A ray of light passes only through pure water, and water diluted with milk has a bluish-gray tint.
WHY? The waves that make up white light have different lengths depending on the color. Milk particles release and scatter short blue waves, causing the water to appear bluish. The nitrogen and oxygen molecules found in the earth's atmosphere, like milk particles, are small enough to also emit blue waves from sunlight and scatter them throughout the atmosphere. This makes the sky appear blue from Earth, and the Earth appears blue from space. The color of the water in the glass is pale and not pure blue, because large particles of milk reflect and scatter more than just the blue color. The same thing happens to the atmosphere when large amounts of dust or water vapor accumulate there. The cleaner and drier the air, the bluer sky, because blue waves scatter the most.
Experience No. 9 “Far and Close”
Target: establish how distance from the Sun affects air temperature.
Equipment: 2 thermometers, table lamp, long ruler (meter)
Results: The closest thermometer shows a higher temperature.
WHY? The thermometer that is closer to the lamp receives more energy and therefore heats up more. The further the light spreads from the lamp, the more its rays diverge, and they can no longer heat up the distant thermometer much. The same thing happens with planets. Mercury, the planet closest to the Sun, receives the most energy. Planets farther from the Sun receive less energy and their atmospheres are colder. Mercury is much hotter than Pluto, which is very far from the Sun. As for the temperature of the planet's atmosphere, it is also influenced by other factors, such as its density and composition.
Experience No. 10 “How far is it to the moon?”
Target: Find out how you can measure the distance to the Moon.
Equipment : 2 flat mirrors, adhesive tape, table, piece of notebook, flashlight.
Tape the mirrors together so that they open and close like a book. Place mirrors on the table.
Attach a piece of paper to your chest. Place the flashlight on the table so that the light falls on one of the mirrors at an angle.
Find a position for the second mirror so that it reflects light onto the piece of paper on your chest.
Results: A ring of light appears on the paper.
WHY? The light was first reflected from one mirror to another, and then onto a paper screen. The retroreflector left on the Moon is made up of mirrors similar to those we used in this experiment. By measuring the time during which a laser beam sent from the Earth was reflected in a retroreflector installed on the Moon and returned to Earth, scientists calculated the distance from the Earth to the Moon.
Experience No. 11 "Distant Glow"
Target: determine why Jupiter's ring shines.
Equipment: flashlight, talc in plastic packaging with holes.
Results: the beam of light is barely visible until the powder hits it. The scattered talc particles begin to shine and the light path can be seen.
WHY? Light cannot be seen until it bounces off something and hits your eyes. Talc particles behave in the same way as the small particles that make up Jupiter's ring: they reflect light. Jupiter's ring is located fifty thousand kilometers from the planet's cloud cover. These rings are thought to be made up of material that came from Io, the closest of Jupiter's four moons. Io is the only moon we know of with active volcanoes. It is possible that Jupiter's ring was formed from volcanic ash.
Experiment No. 12 "Day Stars"
Target: show that the stars are constantly shining.
Equipment: hole punch, postcard-sized cardboard, white envelope, flashlight.
Results: holes in the cardboard are not visible through the envelope when you shine a flashlight on the side of the envelope facing you, but become clearly visible when the light from the flashlight is directed from the other side of the envelope, directly at you.
WHY? In a lit room, light passes through the holes no matter where the lit flashlight is, but they become visible only when the hole, thanks to the light passing through it, begins to stand out against a darker background. The same thing happens with stars. During the day they also shine, but the sky becomes so bright due to sunlight that the light of the stars is obscured. The best time to look at the stars is on moonless nights and away from city lights.
Experience No. 13 “Beyond the Horizon”
Target: establish why the Sun can be seen before it rises above the horizon.
Equipment: clean liter glass jar with a lid, table, ruler, books, plasticine.
Place the jar on the table 30 cm from the edge of the table. Place books in front of the can so that only a quarter of the can remains visible. Make a ball the size of a walnut from plasticine. Place the ball on the table, 10 cm from the jar. Kneel in front of the books. Look through the jar of water, looking over the books. If the plasticine ball is not visible, move it.
Remaining in this position, remove the jar from your field of vision.
Results: you can only see the ball through a jar of water.
WHY? The jar of water allows you to see the ball behind the stack of books. Anything you look at can only be seen because the light emitted by that object reaches your eyes. Light reflected from a plasticine ball passes through a jar of water and is refracted in it. Light emanating from celestial bodies passes through the earth's atmosphere (hundreds of kilometers of air surrounding the Earth) before reaching us. The Earth's atmosphere refracts this light in the same way as a jar of water. Due to the refraction of light, the Sun can be seen several minutes before it rises above the horizon, as well as for some time after sunset.
Experiment No. 14 “Star Rings”
Target: determine why stars appear to move in circles.
Equipment : scissors, ruler, white chalk, pencil, adhesive tape, black paper.
Poke a pencil through the center of the circle and leave it there, securing it at the bottom with duct tape. Holding the pencil between your palms, quickly twist it.
Results: Light rings appear on the rotating paper circle.
WHY? Our vision retains the image of white dots for some time. Due to the rotation of the circle, their individual images merge into light rings. This happens when astronomers photograph stars using long exposures. The light from the stars leaves a long circular trail on the photographic plate, as if the stars were moving in a circle. In fact, the Earth itself moves, and the stars are motionless relative to it. Although it seems that the stars are moving, the plate is moving along with the Earth rotating around its axis.
Experiment No. 15 “Star Hours”
Target: find out why the stars do Roundabout Circulation across the night sky.
Equipment: umbrella dark color, white chalk.
Results: the center of the umbrella will remain in one place while the stars move around.
WHY? The stars in the constellation Ursa Major make an apparent movement around one central star - Polaris - like the hands on a clock. One revolution takes one day – 24 hours. We see the rotation of the starry sky, but this is only an illusion to us, since in fact our Earth rotates, and not the stars around it. It makes one revolution around its axis in 24 hours. The Earth's rotation axis is directed towards North Star and therefore it seems to us that the stars revolve around it.
Experiments on the theme "Space"
Experiment No. 1 “Making a cloud.”
Target:
- introduce children to the process of formation of clouds and rain.
Equipment: three-liter jar, hot water, ice cubes.
Pour hot water into a three-liter jar (about 2.5 cm). Place a few ice cubes on a baking sheet and place it on top of the jar. The air inside the jar will begin to cool as it rises. The water vapor it contains will condense, forming clouds.
This experiment simulates the process of cloud formation as warm air cools. Where does rain come from? It turns out that the drops, having heated up on the ground, rise upward. There they get cold, and they huddle together, forming clouds. When they meet together, they increase in size, become heavy and fall to the ground as rain.
Experiment No. 2 “Solar System”.
Target:
Explain to the children. Why do all planets revolve around the Sun?
Equipment: yellow wooden stick, threads, 9 balls.
Imagine that the yellow stick is the Sun, and 9 balls on strings are the planets
We rotate the stick, all the planets fly in a circle, if you stop it, then the planets will stop. What helps the Sun hold up the entire solar system?..
The sun is helped by perpetual motion.
That's right, if the Sun doesn't move, the whole system will fall apart and this eternal motion won't function.
Experiment No. 3 “Sun and Earth”.
Target:
Explain to children the relationship between the sizes of the Sun and Earth
Equipment: big ball and bead.
The size of our beloved star is small compared to other stars, but by earthly standards it is huge. The diameter of the Sun exceeds 1 million kilometers. Agree, even for us adults it is difficult to imagine and comprehend such dimensions. “Imagine, if our solar system was reduced so that the Sun became the size of this ball, then the earth, along with all the cities and countries, mountains, rivers and oceans, would become the size of this bead.
Experiment No. 4 “Day and Night”.
Target:
- Explain to children why there is day and night.
Equipment: flashlight, globe.
The best way to do this is on a model of the solar system! . You only need two things for it - a globe and a regular flashlight. Turn on a flashlight in a darkened group room and point it at the globe approximately your city. Explain to the children: “Look; The flashlight is the Sun, it shines on the Earth. Where it is light, it is already day. Now, let’s turn it a little more - now it’s shining on our city. Where the rays of the Sun do not reach, we have night. Ask the children what they think happens where the line between light and dark is blurred. I’m sure any kid will guess that it’s morning or evening
Experiment No. 7 “Who invented summer?”
Target:
- Explain to children why there is winter and summer.
Equipment: flashlight, globe.
Let's look at our model again. Now we will move the globe around the “sun” and observe what happens to the lighting. Due to the fact that the sun illuminates the surface of the Earth differently, the seasons change. If it is summer in the Northern Hemisphere, then in the Southern Hemisphere, on the contrary, it is winter. Tell us that it takes the Earth a whole year to fly around the Sun. Show the children the place on the globe where you live. You can even stick a little paper man or a photo of a baby there. Move the globe and try with your children to determine what time of year it will be at this point. And don’t forget to draw the attention of young astronomers to the fact that every half revolution of the Earth around the Sun, polar day and night change places.
Experiment No. 5 “Eclipse of the Sun.”
Target:
- Explain to children why there is an eclipse of the sun.
Equipment: flashlight, globe.
Many phenomena occurring around us can be explained even completely small child simple and clear. And this must be done! Solar eclipses in our latitudes - a great rarity, but this does not mean that we should ignore such a phenomenon!
The most interesting thing is that the Sun is not made black, as some people think. Observing the eclipse through smoked glass, we are still looking at the same Moon, which is located opposite the Sun. Yes... it sounds unclear. Simple means at hand will help us out.
Take a large ball (this, naturally, will be the Moon). And this time our flashlight will become the Sun. The whole experience consists of holding the ball opposite a light source - here you have the black Sun... How simple it all turns out.
Experiment No. 6 “Far - close.”
Target:
Determine how distance from the Sun affects air temperature.
Equipment: two thermometers, a table lamp, a long ruler (meter).
PROCESS:
Take a ruler and place one thermometer at the 10 cm mark and the second thermometer at the 100 cm mark.
Place a table lamp at the zero mark of the ruler.
Turn on the lamp. After 10 minutes, record the readings of both thermometers.
RESULTS: The closest thermometer shows a higher temperature.
WHY? The thermometer that is closer to the lamp receives more energy and therefore heats up more. The further the light spreads from the lamp, the more its rays diverge, and they can no longer heat up the distant thermometer much. The same thing happens with planets. Mercury, the planet closest to the Sun, receives the most energy. Planets farther from the Sun receive less energy and their atmospheres are colder. Mercury is much hotter than Pluto, which is very far from the Sun. As for the temperature of the Planet’s atmosphere, it is also influenced by other factors, such as its density and composition.
Experiment No. 7 “Space in a jar.”
Work method:
1) take the prepared container and put cotton wool inside
2) pour glitter into the jar
3) pour a bottle of glycerin into the jar
4) dilute food coloring and pour everything into a jar
5) top up 6) if you made it in a jar, then close everything with a lid and seal it with glue or water plasticine
Educational area:"Cognitive Development".
Subject:"Space experiments".
Tasks:
1. Clarify and expand children’s ideas about space through familiarization with new concepts ( virtual trip, weightlessness, satellite, crater, compartment, rover) and conducting experiments and experiments.
2. Develop children's creative imagination and verbal and logical thinking.
3. Cultivate curiosity, goodwill and prudence.
Equipment and materials:multimedia installation, tape recorder; soft modules, tables, chairs, aprons, cards “Safety rules when conducting tests and experiments,” a thermos with hot water, glass, a bowl of flour, jumping balls, glasses with an alcohol solution, pipettes, skewers and plates for each child, jars with sunflower oil, wet wipes, distributions, waste containers, educational cards “Cosmos”.
Progress of educational activities:
The teacher and children enter the group (hall).
— Guys, do you like to travel?
- Yes!
— Tell me about your travels. Where are you in such at a young age Have you already visited?
— My family and I were on vacation in Turkey... And we went to Sochi in the summer...
- Today you and I will also go on a trip. And it will be a virtual trip into space! The word travel is familiar to you. What does the word “virtual” mean?
- Fictional.
- That's right, “virtual”, that is, not real, imaginary. I hope you like to fantasize?
- Yes!
- Then let's not waste time!
- To go to space trip we need to become... What do you call people who fly into space and conduct tests there?
- Cosmonauts.
-Exactly! Let's imagine ourselves as astronauts?
- Yes.
— Cosmonauts have special suits. What are they called?
- Space suits.
— Unfortunately, you and I don’t have spacesuits. But, there are such interesting aprons and our imagination. Put them on and imagine that they are spacesuits.
- In front of me are real astronauts! In such spacesuits you and open space not scary!
- It's time to go! What will we fly on? - On a rocket?
— We have soft modules. Let's try to turn them into a rocket?
- Yes.
— I propose to arrange them in the shape of a circle (these will be our seats) and don’t forget to leave room for the landing hatch. Arrange modules. We take our seats in the rocket.
- Attention! There are 10 seconds left before the rocket launch. - Guys, distribute the air in such a way as to count from 10 to 1 and loudly and clearly pronounce the word “launch.” We take in air through the nose... We begin counting down the time: 10,9,8,7,6,5,4,3,2,1. Start! An audio recording of the sound of a rocket taking off is heard.Cosmic music sounds. The teacher turns on the disc lamp.
- Guys, what's going on? The teacher gets up and begins to imitate the state of weightlessness.
- This is weightlessness.
- We're in space. There is no gravity here. Therefore we are in a state of weightlessness. How beautiful it is here!
A picture of planet Earth appears on the screen.
- Guys, look out the window. What do you see?
- This is our Earth.
- That's right, this is our home planet - Earth. This is what it looks like from space. What shape does it have?
- The shape of a ball.
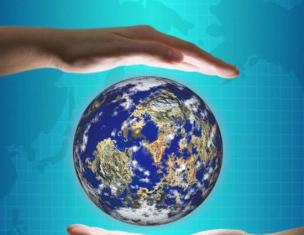
— The earth is a huge ball. Just look how beautiful she is! It is often called the "blue planet." Why do you think?
— Because there is a lot of water on Earth.
- Well done! There are 9 planets in the solar system, among which the most unique planet- This is planet Earth. Because only on it does life exist. But it was not always so. Do you want to know how our planet came to be?
- Yes.
— Some scientists suggest that the Sun was originally a huge hot ball. One day there was an explosion on it, as a result of which huge pieces broke off from the Sun, which became known as planets. At first our planet was hot, but gradually it began to cool. Look, I have a thermos with hot water. I suggest you dream up and imagine that this is our hot planet. Now I will open the lid and “our planet” will begin to cool down. What happens?
— Steam is formed.
— We see how the water begins to evaporate. In cold air, the steam turns back into water and begins to accumulate. We can see this if we hold the glass over the thermos. What happens when too many water droplets accumulate on the glass?
- They will fall back into the thermos.
- You're right. This is exactly how, according to scientists, water fell in the form of rain onto the already cooled Earth, and the first ocean was formed. And life arose in the ocean. Unfortunately, it is impossible to know exactly what the Earth was like many billions of years ago, so these are just scientists’ guesses.
An image of the Moon appears on the screen.
- Guys, just look, we are flying past some celestial body. What is this?
- This is a planet.
— Maybe my riddle will help you recognize this planet:
Sometimes he loses weight, sometimes he gets fatter,
It shines from the sky, but does not warm,
And only one to Earth
Always looking away.
- This is the Moon.
— The moon is a satellite of the earth. What do you think a satellite is?
— It revolves around the earth.
- That's right, guys, a satellite is heavenly body which orbits the planet. The moon is the celestial body closest to the earth and the only one where humans have been. There is no water, no air, no weather on the Moon. And its surface is strewn with craters - pits that appeared from the impacts of huge meteorite stones billions of years ago. Want to see how it was?
- Yes!
“Then, I suggest you go to the next compartment.” The teacher and children approach the table on which there is a bowl of flour.
- Guys, look, there is a bowl of flour in front of you. Let's imagine that this is the surface of the Moon, covered with cosmic dust. And these balls are jumpers - meteorites. Shall we stage a meteorite attack on the lunar surface? I suggest throwing “meteorites” from different heights, then to see if the same craters are formed. Children and the teacher throw bouncing balls into a bowl of flour from different heights.
— What happens to the flour?
- Pits form in it.
-Are they the same?
- No!
— What determines the size of the pit-craters?
- Depending on the size of the jumping ball.
- And the depth of the hole?
- From the height from which he was thrown.
— That’s right, guys, the higher the jumping ball is from the surface during the throw, the greater the speed of its flight, which means the hole-crater will be deeper. And the size of the meteorite affects the size of the crater formed. Look at the screen. This is a photograph of the surface of the moon from space. Is our imaginary lunar surface similar to the real one?
- Yes.
“I suggest we return to our landing compartment and see what we are flying through at the moment.”
An image of Mars appears on the screen.
- This is the most mysterious planet in our solar system - Mars. It is also called the “red planet”. Why do you think?
- Because it is red.
- You are right, precisely because it has a reddish-brown surface tint. And it is mysterious because people have long believed that there is life on Mars. What are the creatures that live on Mars called?
- Martians.
- They seem to be glad to meet us and send their musical greetings! Shall we dance with them? The teacher turns on the musical physical exercise “Aliens”.
- Guys, in fact, man never discovered any Martians on Mars, although... maybe he just didn’t look well. But the rovers sent to the planet (a spacecraft designed to move on the surface of the planet Mars) were able to discover there the highest mountain in the solar system, the deepest valley and the most extensive in the solar system dust storms, which cover the entire planet and can last several months.
An alarm sounds on the spaceship.
— Guys, instruments show that now there is a period of dust storms on Mars. We flew too close and our spaceship received damage. Therefore, it is urgent to return to Earth. Fasten seat belts. We are returning to Earth. An audio recording of the rocket landing and landing is played.
- Here we are at home, on our native Earth... It’s only a pity that we weren’t able to see the rest of the planets of the solar system. Although, at the cosmodrome there is a laboratory in which you and I can create our own space. Let's imagine ourselves as research scientists?
- Yes!
— Guys, all the objects at the cosmodrome are under security, so in order to get into the laboratory we need to be told the safety rules when conducting experiments. They are encrypted on these clue cards. Let's try to decipher them. The teacher takes turns showing the children hint cards with the rules for conducting experiments. Children name the rules.
- You can ask questions, listen, look, smell and touch only if an adult allows it. You can’t taste it, talk or shout loudly, you need to be careful not to break anything.
- Well done boys! Now we can go to the laboratory. The teacher and children approach the table, on which there are cups with a special solution, cups with sunflower oil, pipettes and skewers for each child.
— There is liquid in the glasses on the table with a very pungent odor. It must be sniffed with caution. And under no circumstances should you taste it. This will be our space environment. In it we will create a system of planets. To do this, we need to take a little oil from a cup into a pipette. The teacher and children draw oil into a pipette. If children do not know how to use a pipette, then the teacher explains to them in detail how to do it: take the pipette in your right hand, like a pen or pencil, just hold it by the rubber part. Squeeze the rubber part of the pipette with your index finger and thumb, then lower the pipette into the oil, then quickly release your fingers and lift the pipette above the cup. There was oil in the pipette.
- Now carefully drop a large drop of oil into a glass or several small drops in the same place ( alternately squeezing and unclenching the rubber part of the pipette with the index and thumb of the right hand). Watch the drop. In the water it would float up and spread over the surface like a round speck of fat. And in a special solution, the drop floats in a beautiful golden ball. This is our first planet. You can even come up with a name for it. For example, call it by your name. And now, using a skewer or pipette, you can add new planets, combine them into one huge one, or, conversely, divide them into several. In your own cosmos, you are powerful creators! Children experiment on their own and observe what is happening.
- Guys, the laboratory is closing, and it’s time for us to return to kindergarten. We will walk along the path of stars and go straight to kindergarten. The teacher and children walk along a path made of stars.
— Did you like our virtual trip?
- Yes!
— What was the most interesting thing on our trip?
— I liked to participate in the formation of craters on the Moon. I liked dancing with the Martians. And what I liked most was creating my own planets...
(If children find it difficult to answer, you can ask leading questions. What planets did our spaceship fly past? Why is the Moon called a satellite of planet Earth? What are craters? Who did we meet on Mars? Why did we have to interrupt the trip? What did we do in the laboratory at the cosmodrome?)
— I liked traveling with such wonderful guys like you!
— Guys, during the lesson we managed to learn a lot of new and interesting things about space and space objects, and I would really like you to continue studying this topic. It's so interesting! And the educational cards “Cosmos” will help you with this. Goodbye, guys! Don't forget to tell your friends about our wonderful trip!