Nitkography - technique that is also called drawing thread. It is based on a consistent filling of the contours of the selected images with cords or thick threads. The history of this type of art originated in the days of the existence of ancient Indian nationality of unesses living in the West and in the center of Mexico. Their main classes were weaving, embroidery, patterned weaving, beaded needlework. Interesting paintings were widespread, which were performed on the basis of yarn from wool. It was a roll of round or square shape in the middle of which was a hole. On both sides of such a foundation, glue was applied, which was based on bee wax and pine resin, on top of which threads were stuck from wool in different color combinations.
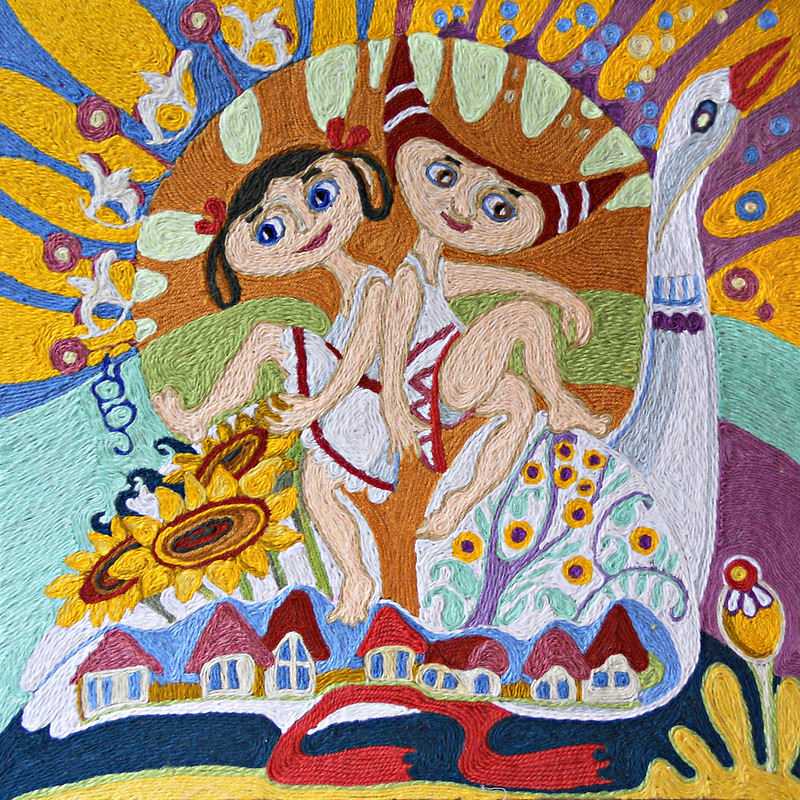
Modern paintings created and using this method are highlighted by soft, volumetric forms. Nitcography is often used in the form of developing classes in kindergarten for children and preschoolers, which allows them to develop imagination, soothes and attracts them to the interesting world of decorative and applied art.
Master class of painting in the technique of nitkography
 This master class will tell you about creating a colorful pattern by the nitcographic method, which shows the cat. Taking on the basis of this training lesson, you can choose your own schemes and create your own original work, as this drawing is quite easy to master the thread. Especially this needlework will pass the beginners and children, both at home and in kindergarten.
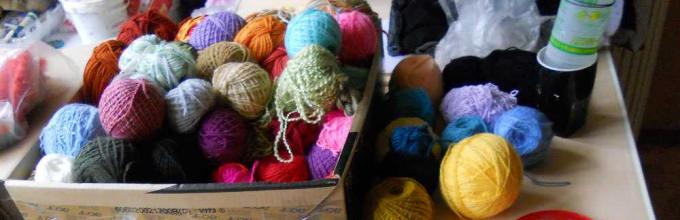
Necessary materials for work:
- dense cardboard (to create a picture, you can also use the DVP sheet);
- scheme;
- threads of suitable shades (for children it is better to choose bright colors);
- glue;
- scissors;
- toothpick.
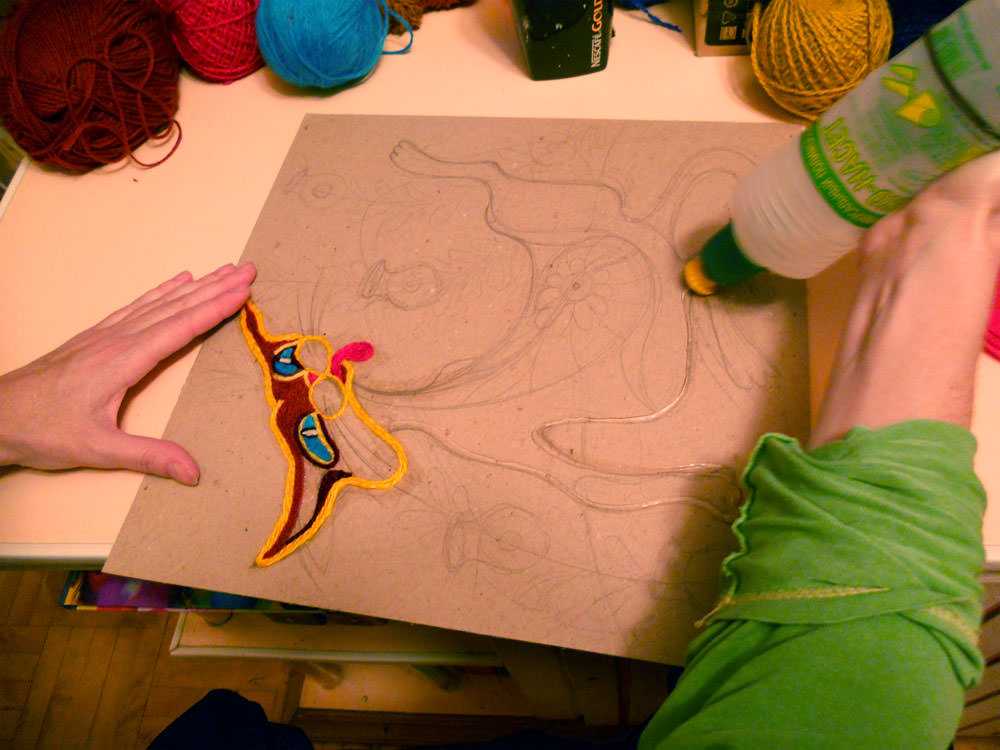
We begin the master class with the transfer of the scheme to the cardboard or the Fiberboard sheet. Pay special attention to the selection of the color of the threads. In the process of creating a similar pattern by the method of nitkography, any materials may be used in the form of yarn from knitting, colorful acrylic yarns, as well as Muline, which it will be necessary to pre-fold several times. The main condition is their identical thickness.
Tip for beginners: Do not use in the nitkographic in the initial stages, the material that has a non-smooth structure. Threads with shaggy or curly components although they give an interesting effect on the result, but they are quite laborious in work.
You can use glue for construction works used for sticking foam plinth.

If you decide to attract children to such a session, learn the instructions of the selected glue regarding the ventilation of the premises.
So, using glue, you need to smear the line on the sheet. It is possible to do this with a toothpick or a thin stick. It is much more convenient to do this with these objects rather than a tassel. It is so much more convenient to miss glue in hard-to-reach places among glued threads. Further, on an unknown adhesive basis, we begin to gently glue the thread, step by step, gently pressing it with your fingers. Thus, it is gradually necessary to decompose the material on the template. The tip of the thread is cut at the time when you reached the moment the sharp impossible reversal of the thread or when it was necessary to introduce the next tint.
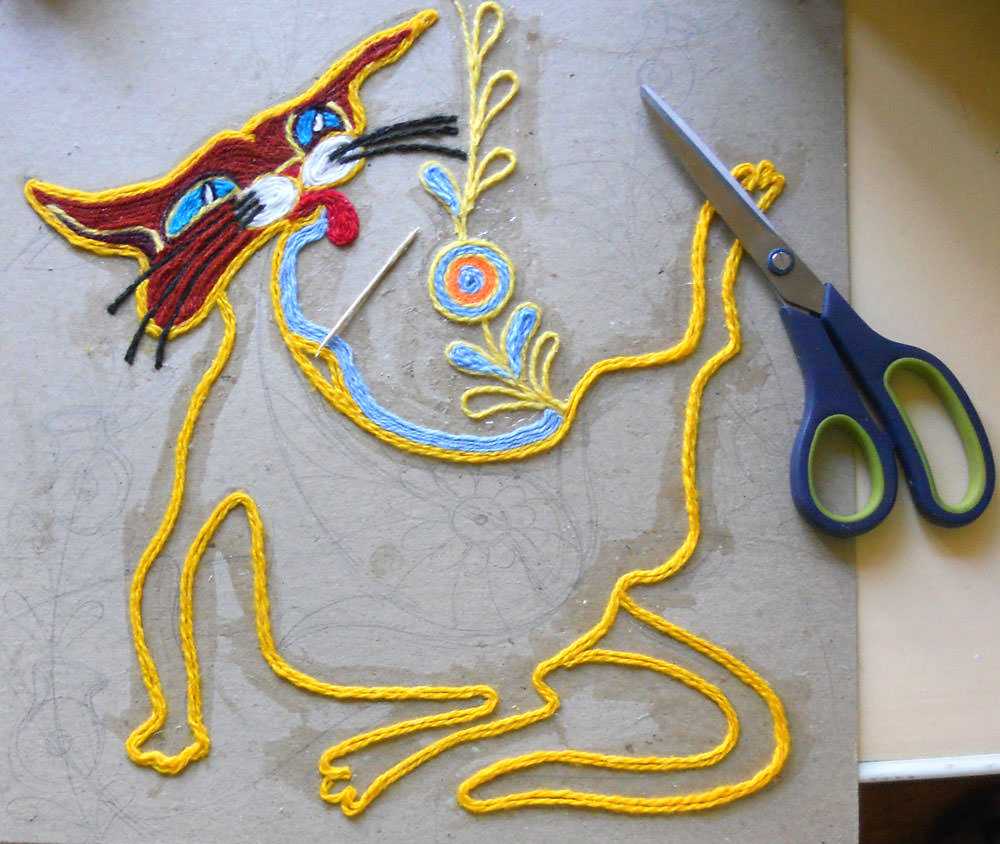
We continue the lesson to study the technique of nitkography. At the beginning of the process, the contour of a large template is glued, after which it is necessary to go to the filling of the entire space in the middle of the product. Small elements, on the contrary, are filled in initially in the inside and then the outlines are issued.
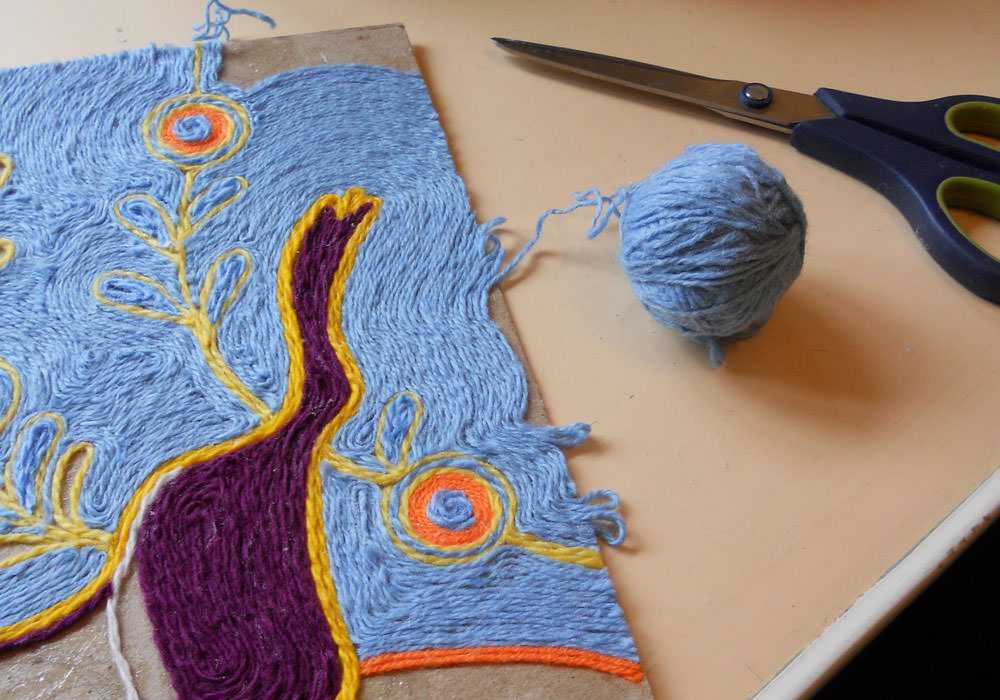
Try to glue the threads close one to another, without the formation of unnecessary lumen. Only in this way you can get a neat and high-quality product at the exit.
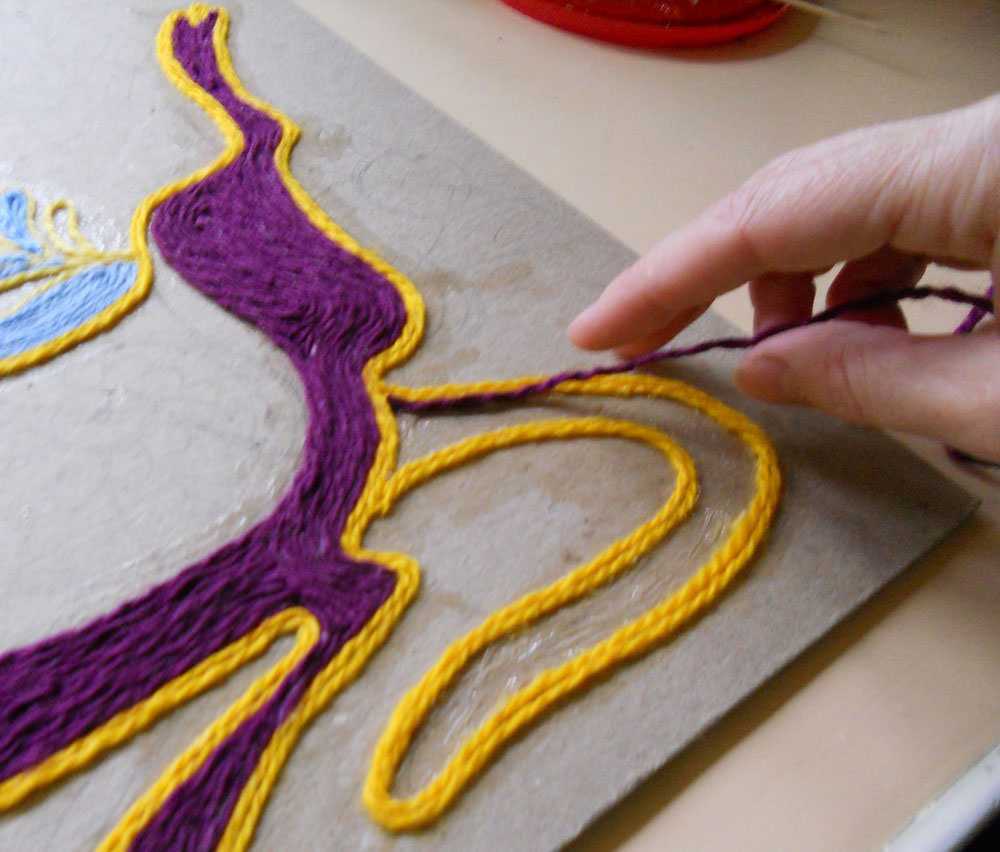
In the process of work, this moment may happen when it will be necessary to replace one color of the material to another. Thanks to a multi-layer thicker in the form of cardboard, it will be easy to do enough.
In this master class, the technique of nitkography, we consider an example of a change in one color on the other on the example of the cat tag. We take a paper knife and cut the desired contour of the surface where you decide to change the shade of the threads. This piece is broken together with a paper layer. On the resulting empty surface glue the material of the shade you need. These actions can be carried out repeatedly, but carefully, given the remaining cardboard layers.
Creating the edges of the picture by the nitcographic method, do not trim each of the fibers separately. This operation will not help you save on the material. Try to output the threads beyond the boundaries of the product, then trim all of one line. The remaining pile in the edges can easily be stubbing in the frame under the baguette.
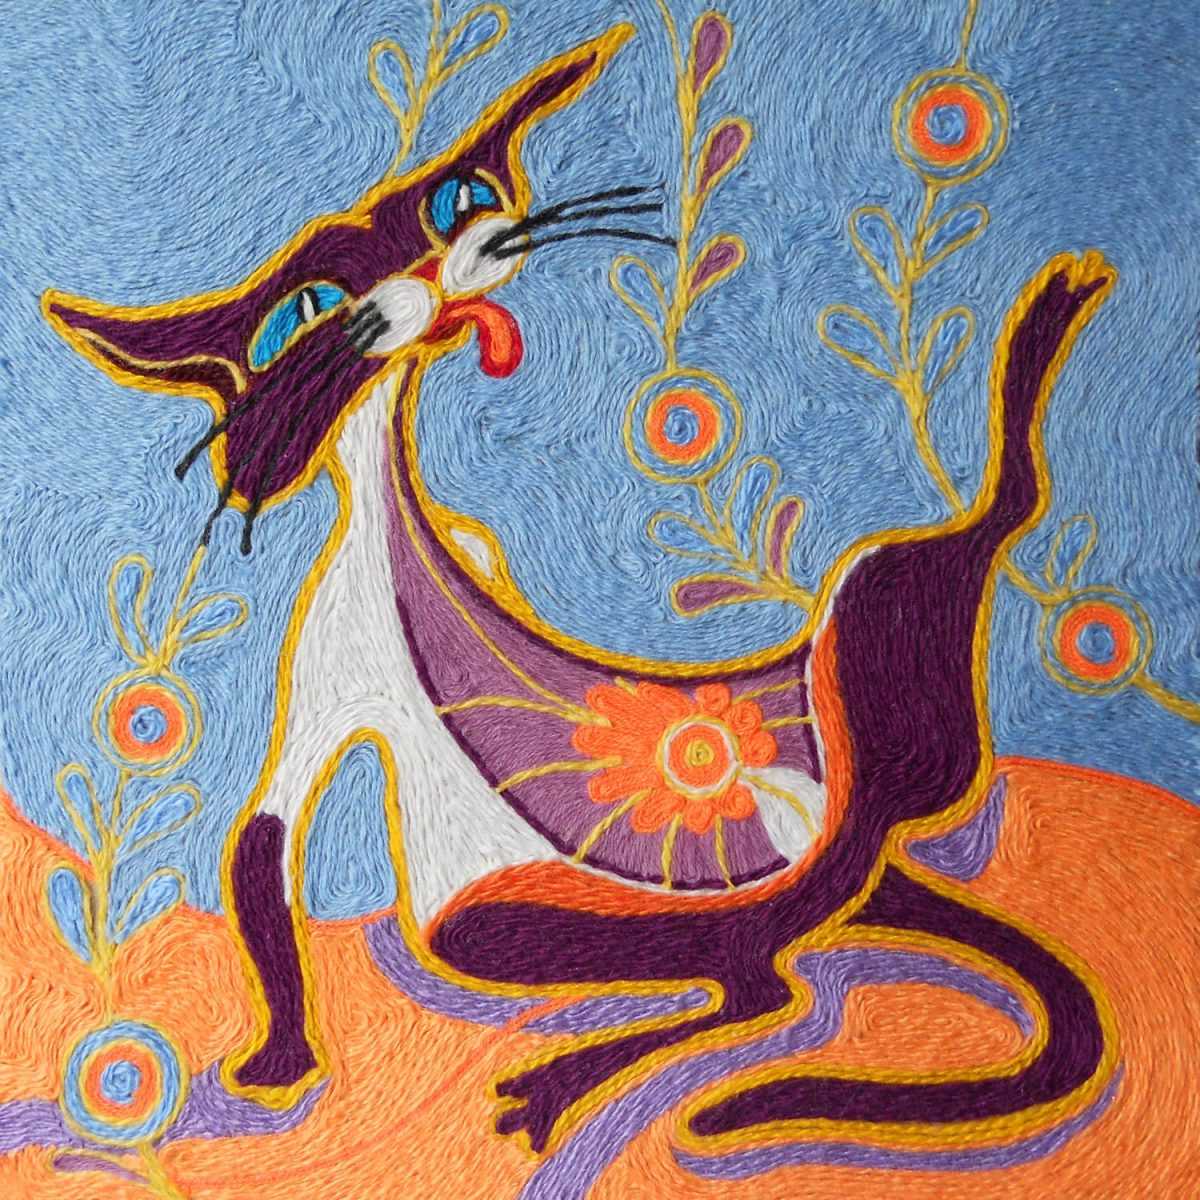
At the end of the work, try to disappear the finished product with an iron through a wet cloth. Such an action will help threads to cherish one to another, and the picture itself in the technique of nitkography will look smoothly and beautiful. Here is such a wonderful bright kitty, as in the photo, you get as a result of a simple action scheme.
Nitcope
Another interesting needlework, to which you can attach children is a nichkopean. Using the example of this lesson, we will show you how to make the original handicraft with your own hands using an interesting methodology in drawing.
Technique Nietcope uses the threads of the middle thickness. The presented master class will demonstrate the manufacture of colorful colors, which can further reorganize, showing all its creative qualities.
In order to make a product in a technique of a nitcope, prepare the following set of materials and tools:
- album sheets;
- mascara or liquid gouache;
- capacities where you can pour colors;
- thread;
- napkins of fabric and paper.
At the beginning, you need to blame the paints of a variety of shades of cooked containers. The next step, it is necessary to lower the thread in them and, using the spoon, squeeze it. The second tip is held in hand. Next, the paper unfolds on the paper, as in the photo. The second tip must be free. We repeat such actions the required number of times, depending on how much you want to make colors. We produce such a process fairly rapid pace so that the paint does not have time to push.
After that, you need to use another album sheet and put it on top of the applied image. It remains to collect all the tips in the hand and keeping the leaf located on top, dramatically pull the threads.
These are simple actions underlie the method of a nitcope. Further, act according to your imagination, trying it either by gluing additional items.
The technique of the nitcope used in kindergarten helps the development of imagination in children. Based on the obtained images, they themselves will be able to think interesting plots in such crafts.